So unfortunately I can't take full credit for these awesome pants that I made so the credit goes to the Pattern Simplicity 4760. That being said the construction is different. The pants are supposed to be like khakis but, I wanted to do something that wasn't in a khaki material so I picked cotton!
Being that I am not the same height as other guys and I still wear kids sizes (I really do), there was a lot of altering in this. For starters the pattern was nice enough to add two sets, one for a men's size and another for kids. With that being said, the fit for the kids would of done better but, the waist and hips were better fitting for me over all. The legs however, well that wasn't any fun. Pants in themselves aren't much of a challenge but, its the fly front that is a tad confusing but, thats later. First the pattern pieces!
People have told me i'm more slender and so I had to seriously take it in. The sizes on the pattern aren't 12-14-16-ect. but, small, medium, large and x-large. I chose small but, the legs on the small are way to big still so I took in before I cut from around the buttock down about two inches, and then put the pattern against my leg to see if it fit well and it was close. The same with the back piece. I then also took the hem up a tremendous amount and mind you I think I shaved off about four inches on both pattern pieces before actually pinning and cutting.
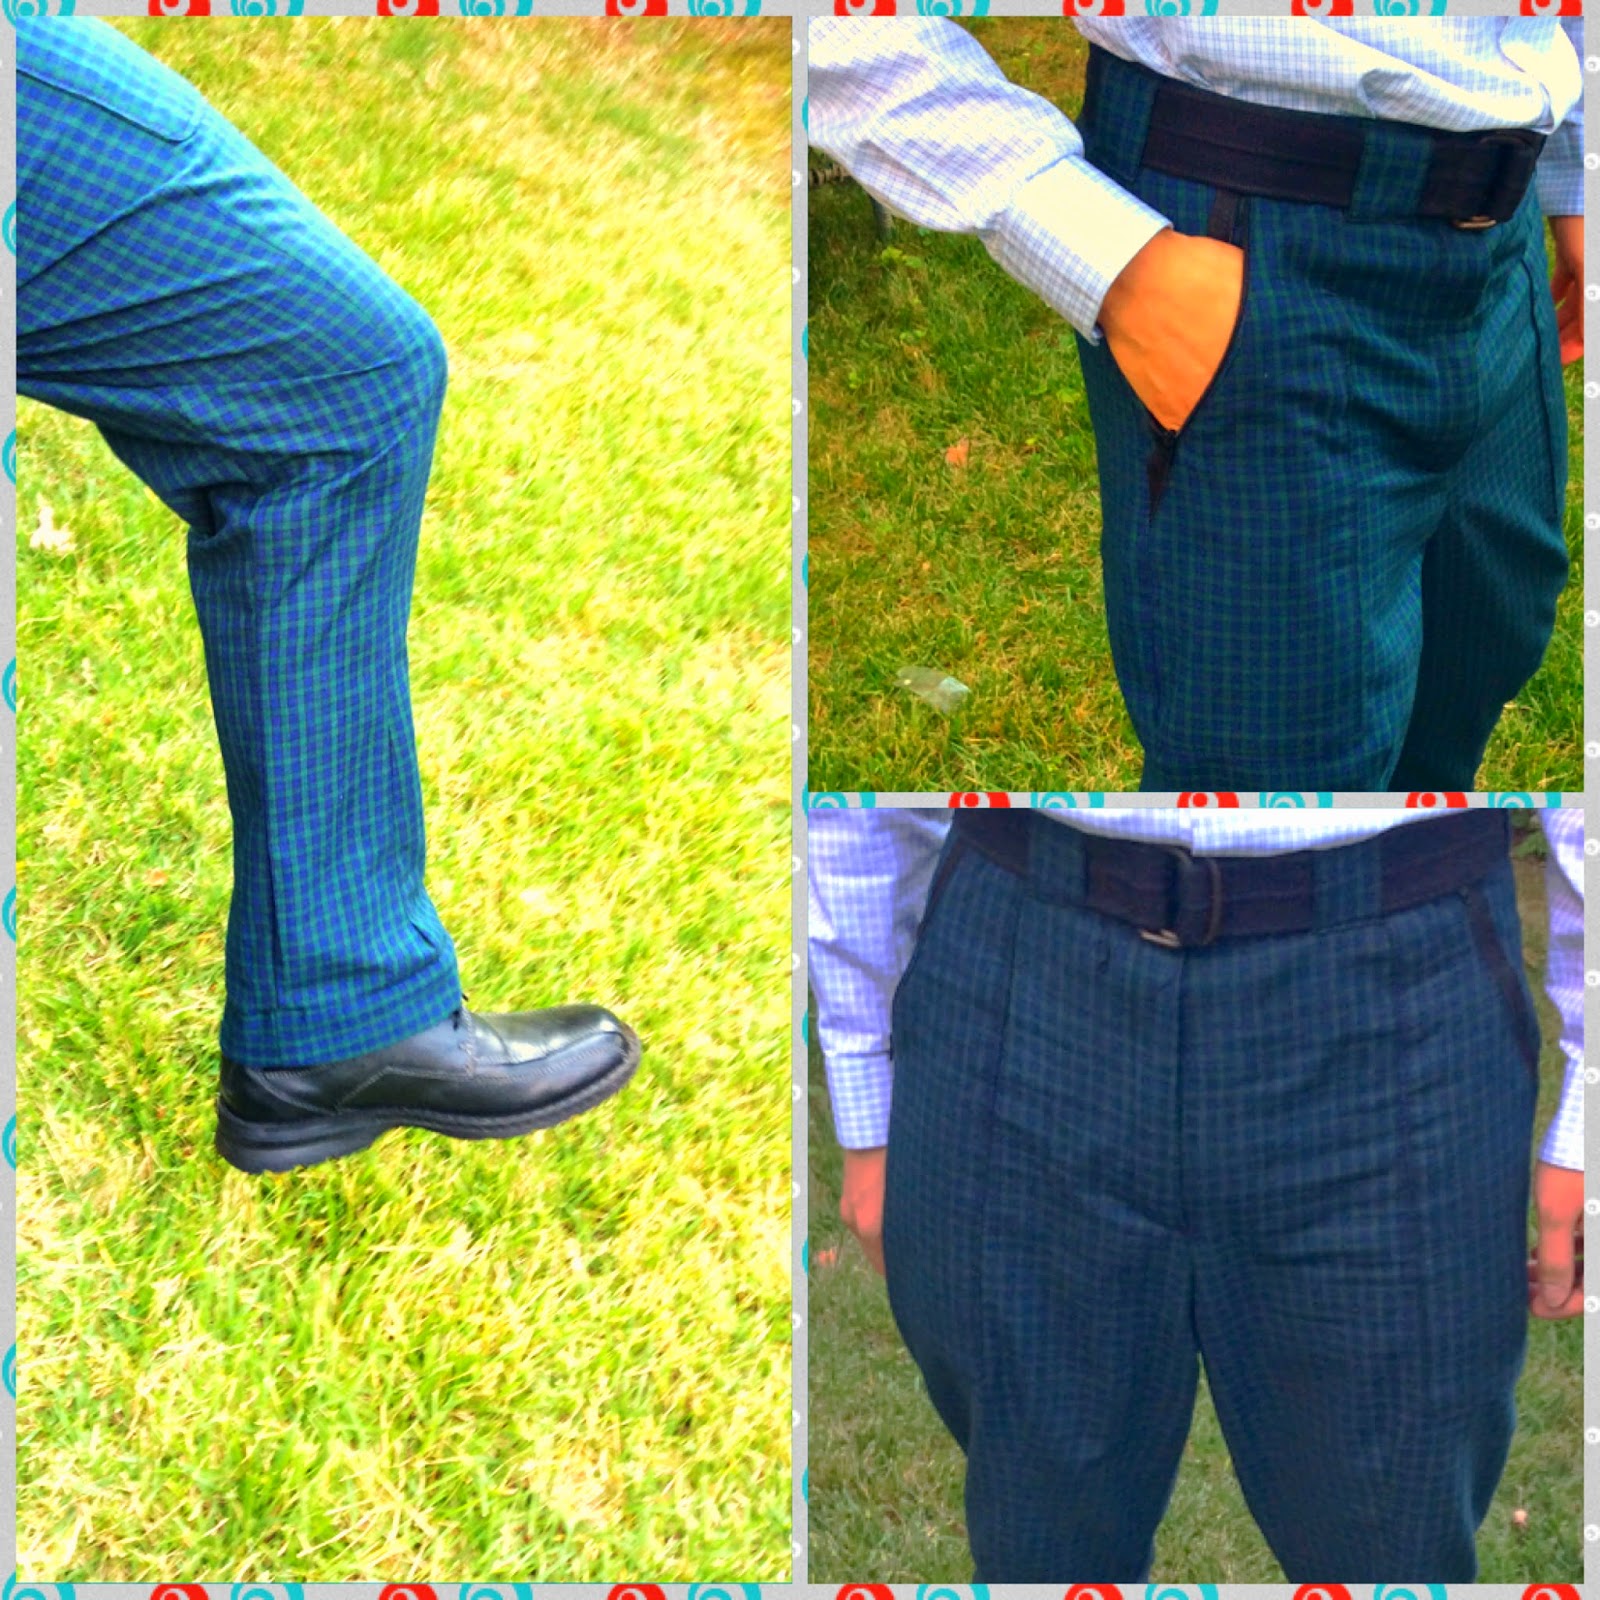
When I did start the construction of the garment, it said to cut one fly front but, I'm used to do the fly with two (I can provide a link if you readers would like :) and trust me when I say this: NEVER LISTEN TO THE PATTERN INSTRUCTIONS FOR A FLY FRONT ZIPPER! It was confusing and so glad I did it my way. To get around the fraying of the fabric, I measured an extra 5/8 of an inch around the fly front but, just not the top since that tucks neatly into the waistband. Then you just do a bridal hem as I've learned around the extra and you have a neat finish that pinking shears yes they do well but, I don't trust them 100% since of my experience. The same was done with the curve of the pants pattern, which does well actually if anyone says otherwise. Then the fly front zipper was done and the pockets were then placed. Mind you these pockets I didn't like originally since I want something to fit my wallet and phone without the worry of falling out so I added zipper to the pockets but, these were patch pockets so it was easy. after that was done I then sewed the legs together but, I didn't top stitch like I normally do since I know with my size, I still have to take in. I then moved onto the waist band which I then interfaced and again strayed from directions. I actually noticed in my years of sewing that the patterns for the waistbands yes are getting more considerate about fabric usage but, also they are getting really really small so instead of just cutting one piece of each I cut two. I then folded and top stitched the waist band to it. I forgot to add, the carriers were added before the waist band and then the top of the carrier is folded and then a close zig-zag stitch is applied to not let it move. Remember everyone, carriers don't always match the size of the waistband, I checked on my jeans and was surprised myself actually. The hem, I added an extra piece of fabric since I don't like my socks showing and I thought it looked nice.
This is a separate paragraph just for the resizing. All that taking in on the pattern and such didn't help as much as I thought. They were just to big since I ended up taking another 4 inches in on each side and when I tried them on, they were still to baggy and didn't look good on me. If anyone is wondering how I got it to hug my legs more, I made fish eye darts (If I remember the correct term). The dart is right down the middle for both legs and starts about an inch after the patch pocket for the front and a little below where my butt ends. It is 1inch at its center on both sides and is about I would say ends 1 1/2 inch before the break in the hem. I added it since I don't like baggy looking pants and I wanted these to be a twist on some professional attire.
So what do you guys think? If you guys like, I can show you how I finish my raw edges my way for those who don't have a domestic serger or a serger (serger is also known as an overlock machine) in general and don't want to do pinking shears in the next post. Its a bit more work but, you'll love the outcome! I can also show you guys a easy way to do a fly front that will come out perfect every time! I actually want to do another pair of plaid pants but, in a different plaid.