Saturday, April 1, 2017

Blue Satin


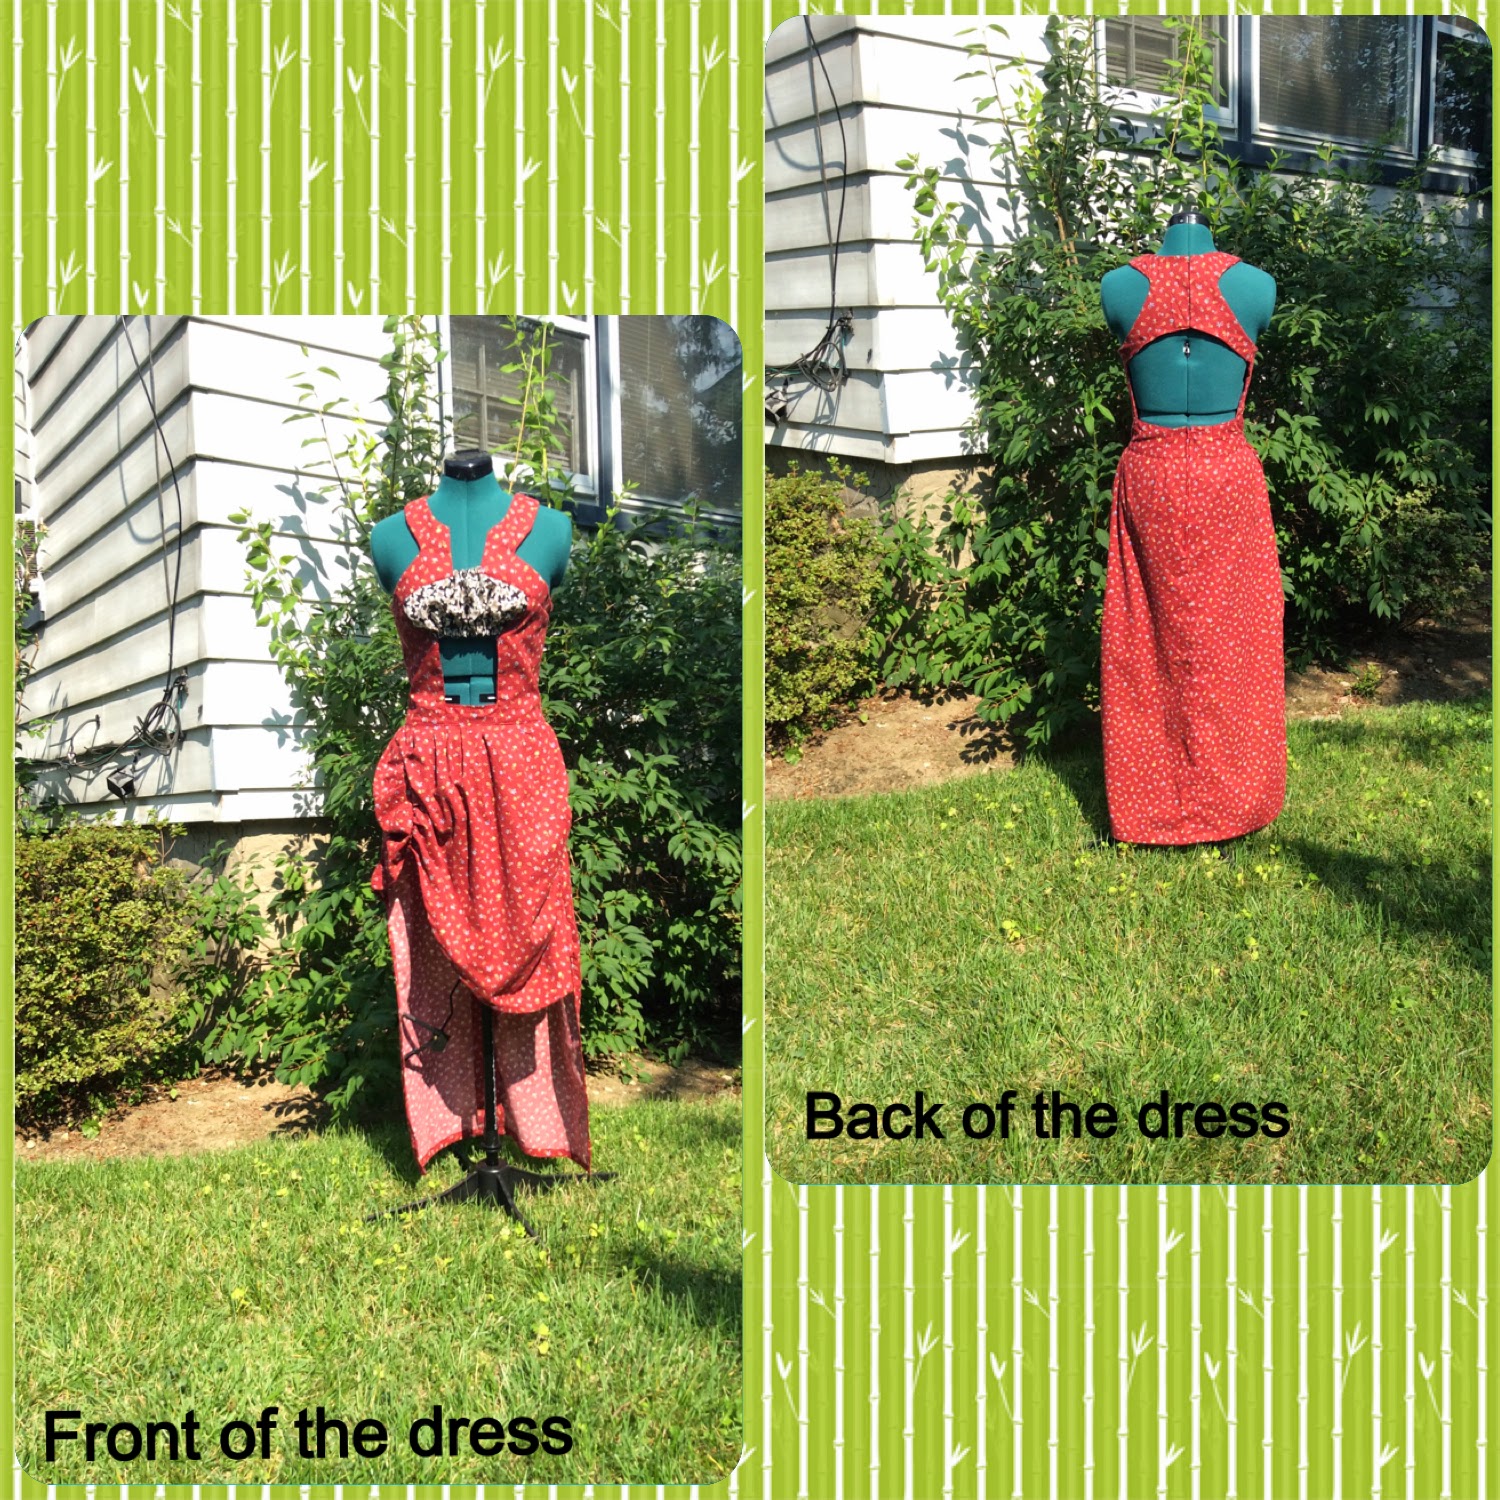
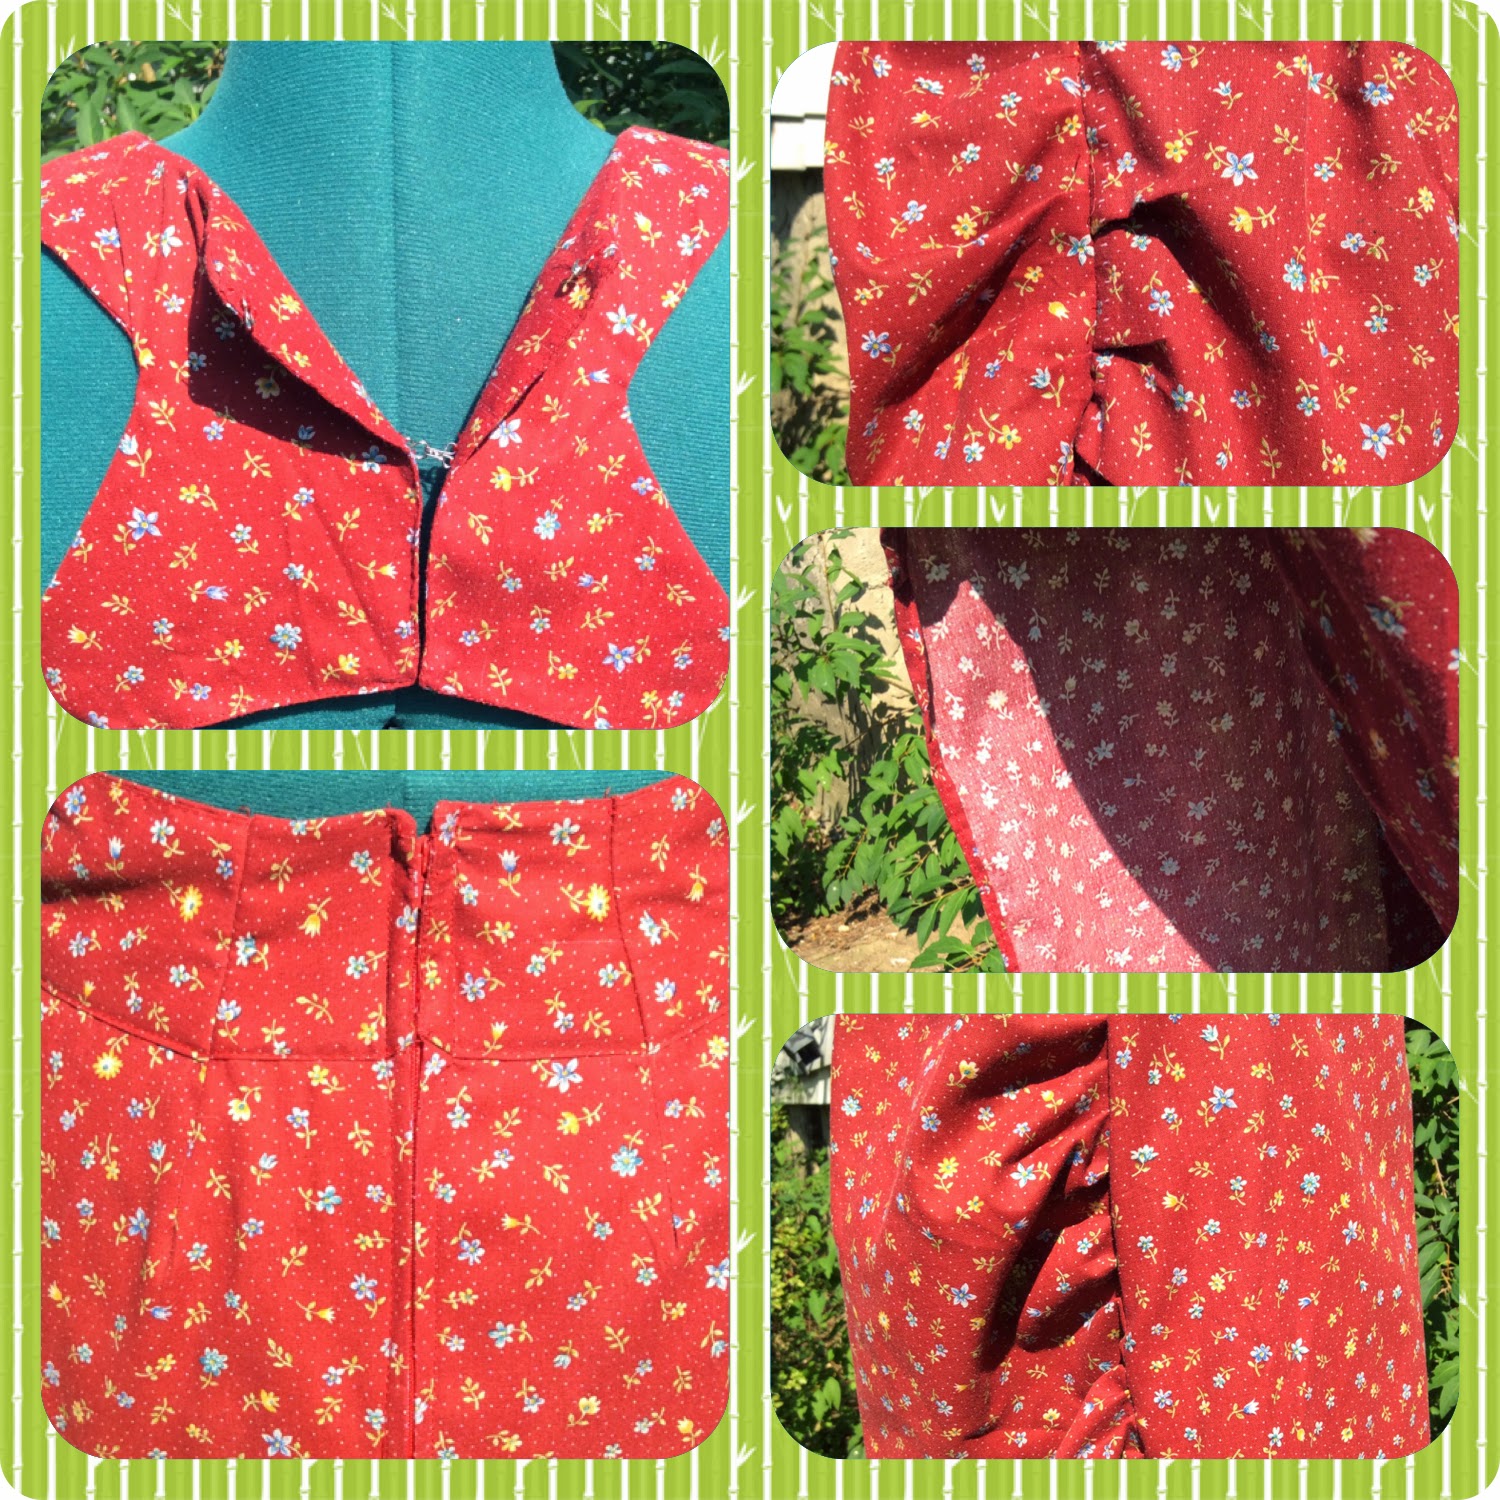
This is one of my first dresses I made from fully pattern drafting and woo was it a killer mainly since I haven't worked with satin since high school. It was also my first time working with horsehair braid which I was so EXCITED about. its a simple dress with a lapel in the back and a long skirt. Looking at the front wheel in the front picture it looks... Creepy, like she has a pogo stick peg leg almost... But back to the dress, the bodice is fitted with a side zipper and is fully lined, the back other than the lapel is an open back as you can see and the skirt is broken up into 6 panels. I added a slit in the center front since I wanted to also do something to the front since it was to conservative for my taste. I wanted to add feathers too and or fringe but... I've been told less is more and so have been trying to dial back my designs at this point. 

Completed March 31, 2017

Four of Pentacles (Draping 2)


This dress I based off of the four off pentacles card. I based it off of this mainly since when reading the novel I remember one card that really popped out that the artist recreated with her characters instead which was the four of pentacles card but, I believe it was from the garden tarot deck. It had on the card peppers and pen castles scattered about along with the main character looking directly at you. I've always been fond of plants and that card just seemed to really stick with me in my head for the longest time. The dress itself is made from 100% cotton fabric and as you might not see it has pepper prints on it. There is a single box pleat radiating from the center back waist and a tulle center front for a bit of appeal. The skirt itself is just a plain circle skirt but, to depreciate the pentacles I cut out 4 circles on the skirt and filled it with tulle. I believe once I did this, the dress was complete and all I wanted to do left was just to finish it which I just mainly used bias tape for since anything more would have made it look to over done. 

Please note, the original model is much shorter and smaller than even the size 8 dress form that I used which is why I added her photo to show you how it really looks. Its a shame however I forgot to take a photo of her in the back......-sigh-...


Completed February 22, 2016

Broken Symmetry (Draping 1)


This geometric slacks I just traced cut on the fabric itself. Its made from a polyester knit and is lined. The torso body is from my hoodie that I then cut up into what you see are the random triangles. The cowl collar I also wanted to give an interesting take to since its different on both the inside and out front and back of the right sides of the garment and thought this would be a nice touch. I wanted it to look simple in the front and then BAM! In the back. The sweat pants to this outfit I used the shape of a regular pair of Levi jeans and then “slash and spread” the pattern piece all together until out came the result but, it is only gathered on one side of the pants. 


Completed December 1, 2015

Gothic Madam (Draping 1)


This dresses main body was up cycled from various garments. The sleeves of the top was made from a pair of dress pants and interestingly it isn’t closed but rather the top of the sleeve is open. The torso itself is made from a stripped skirt and the skirt of the whole ensemble ironically was made from a wrap skirt. The tulle and fringe additions were the only things that weren’t up cycled and had to be purchased. The train in the back I hand detailed by gathering the tulle in certain areas, I wanted to create a sort of sporadic effect. I decided it needed the tulle train and “ascot” thing because it looked too plain to me. I wanted to add drama and although less is more in cases, when I paired the two together, it just clicked in my brain and it felt like it was complete.

This design was based purely off of a gothic design concept I had in my head for a long time. I know this doesn't look as nice on the form which is why I provided an image of how it looked like on the model, isn't it lovely? 


Completed November 9, 2015

Completed: November 2, 2015The torso itself is made from a stripped skirt and the skirt of the whole onsoumble ironically
was made from a wrap skirt. The tulle and fringe addions were the only things that weren’t
upcycled and had to be purchased. The train in the back I hand detailed by gathering the tulle in
certain areas, I wanted to create a sort of sporadic eect. I decided it needed the tulle train and
“hascot” thing because it looked too plain to me. I wanted to add drama and although less is
more in cases, when I paired the two together, it just clicked in my brain and it felt like it was
complete.This design was based purely o of a gothic design concept I had in my head for a long
me.This dresses main body was upcycled from various garments. The sleeves of the top was made
from a pair of dress pants and interesngly it isn’t closed bu rather the top of the sleeve is open.
The torso itself is made from a stripped skirt and the skirt of the whole onsoumble ironically
was made from a wrap skirt. The tulle and fringe addions were the only things that weren’t
upcycled and had to be purchased. The train in the back I hand detailed by gathering the tulle in
certain areas, I wanted to create a sort of sporadic eect. I decided it needed the tulle train and
“hascot” thing because it looked too plain to me. I wanted to add drama and although less is
more in cases, when I paired the two together, it just clicked in my brain and it felt like it was
complete.This design was based purely o of a gothic design concept I had in my head for a long
me.from a pair of dress pants and interesngly it isn’t closed bu rather the top of the sleeve is open.
The torso itself is made from a stripped skirt and the skirt of the whole onsoumble ironically
was made from a wrap skirt. The tulle and fringe addions were the only things that weren’t
upcycled and had to be purchased. The train in the back I hand detailed by gathering the tulle in
certain areas, I wanted to create a sort of sporadic eect. I decided it needed the tulle train and
“hascot” thing because it looked too plain to me. I wanted to add drama and although less is
more in cases, when I paired the two together, it just clicked in my brain and it felt like it was
complete.This design was based purely o of a gothic design concept I had in my head for a long
me.

Thursday, October 23, 2014

Fish Scale Skirt


Hello everyone and I'm sorry for the wait! I've again been very busy since I finally also found a job and so its been taking up a lot of my time as well as school but, finally finished!

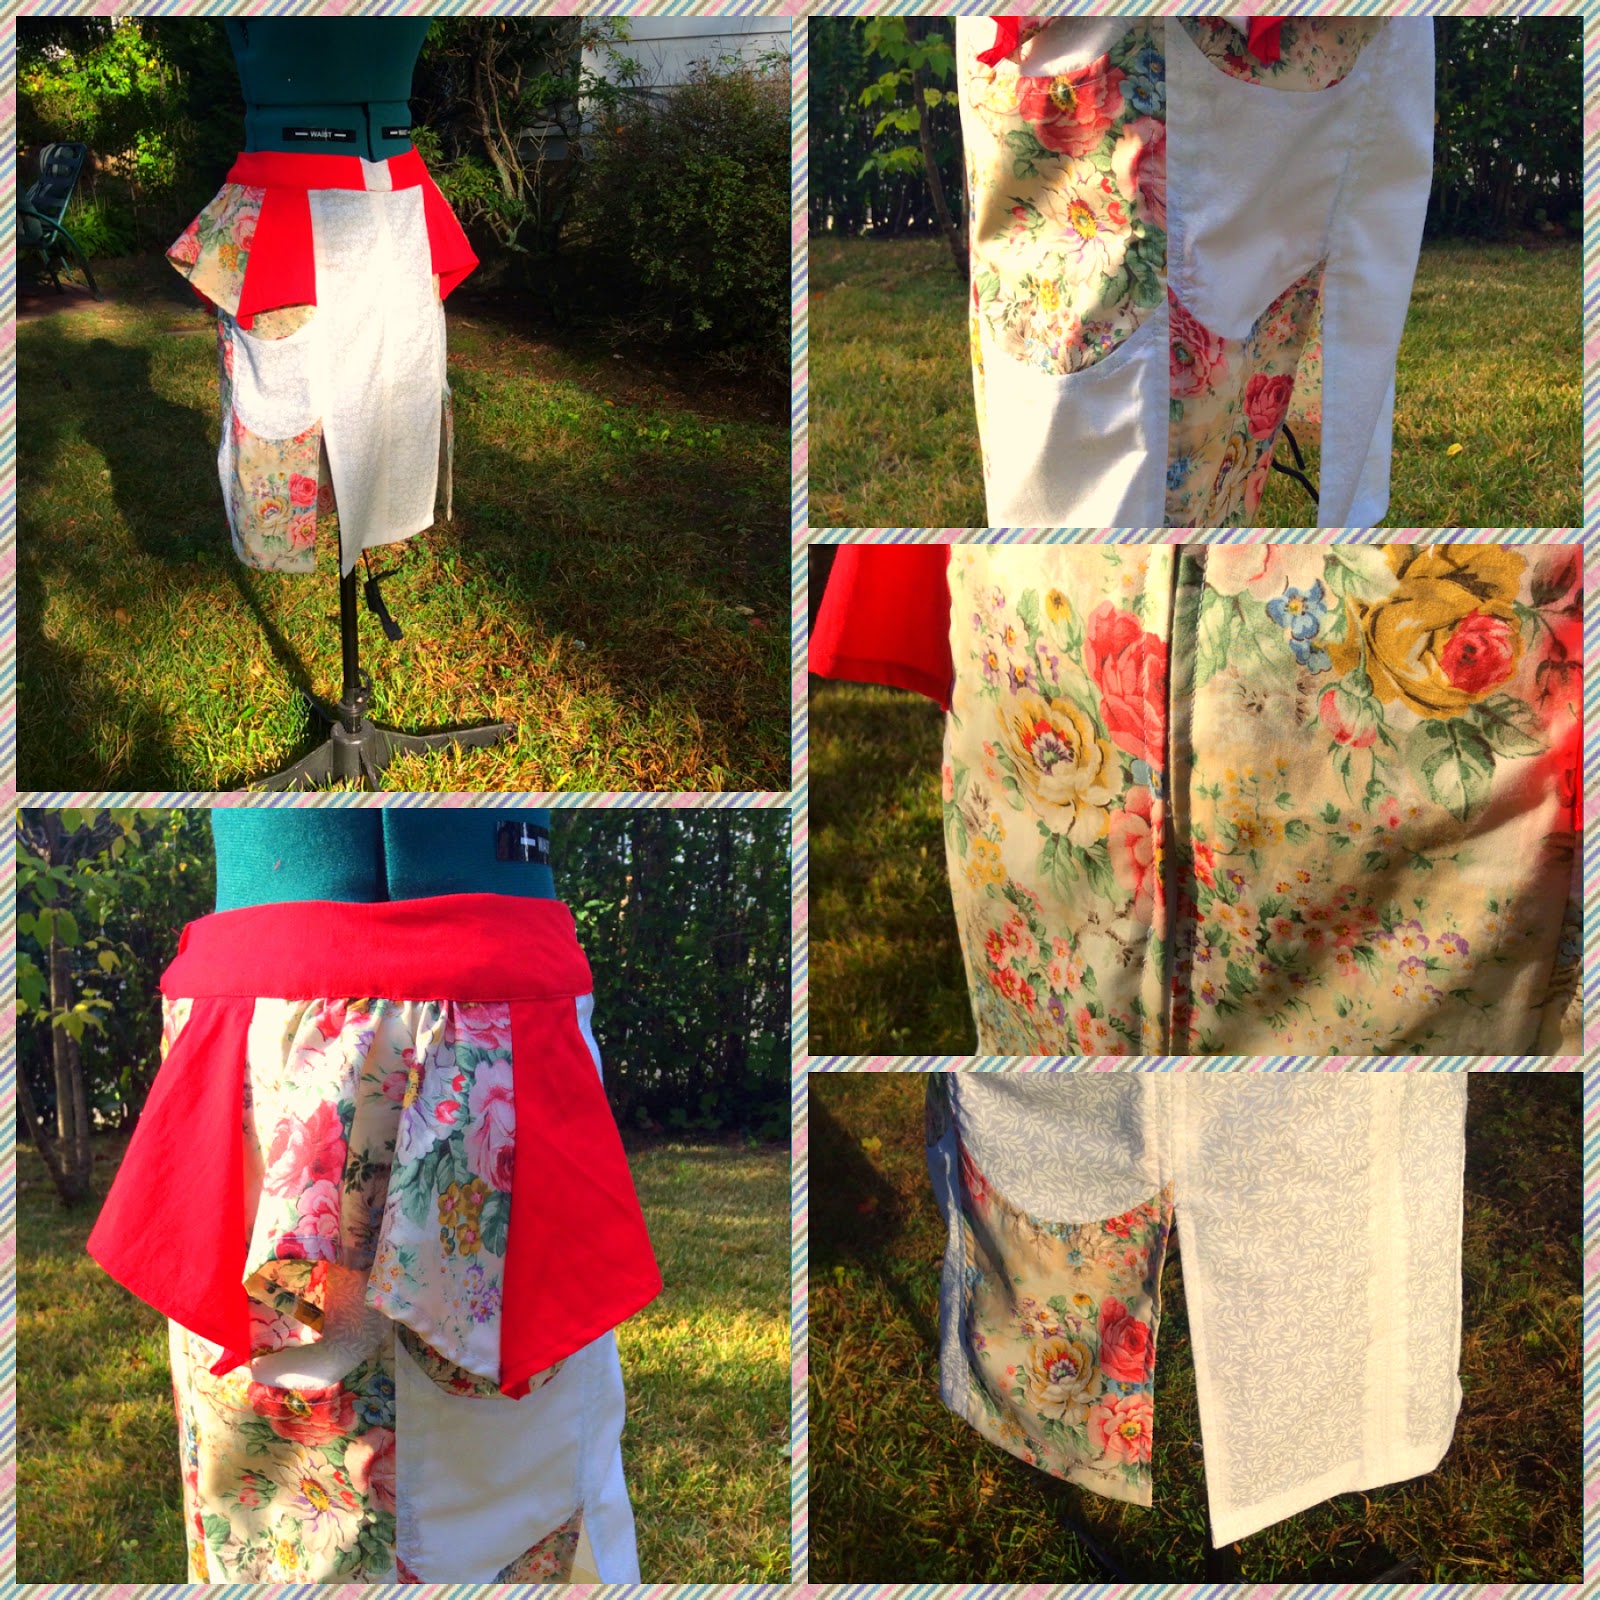
I call this a "fish scale" skirt since the very curved pieces in the skirt remind me of fish scales from this show that I also like to watch called Rehab Addict on DIY network. She repaired some on a house she was doing but, thats another story all together.

So before you guys think anything, this will probably be the official end of any spring/summer stuff for a while. Working in the concept of fall/ winter and already came up with a great idea, I just need someone to test run it so to speak but, onto the design!

This skirt is a peplum skirt with a red waistband. The peplum part I added a pop of red as you can tell and am also playing with a floral and white piece of fabric I found. It is split similarly to the "Black and Red With White in the Middle" skirt post I did a few weeks ago but, no zipper and the top stitching is different as well. The waist band I wanted to do something differently and unfortunately didn't go as planned, the white part in the center of the front was supposed to "triangle" more but, with my lack of knowledge in pattern making I'm really bad at it sometimes unfortunately. The closure on this is the simple hook and eye for the waistband part and Center Zipper for the skirt half. 

Over all I got mixed reviews about this skirt. Some say the skirt would look better with black and floral instead of white, others say its fine. For some reason people also got a "japanese" vibe from it. Personally, I like it but, also could see how much more it would of popped with the black and floral concept. The red parts though, I'm still keeping since I love that color of pop. 

So yes, sorry again it took so long, I also hope I can find someone to "test run" my idea of my first attempt at fall/winter apparel. Please comment on what you guys think of this and if you guys have any request. 


Monday, September 29, 2014

Sorry but, Please Keep Waiting!!!

Hello blog community, I'm sorry for anyone who has or is waiting for an update. I've been very busy lately, and let's just say it's going to continue to be busy. I have been able to start sewing though after all the business in my schedule and currently am still working on it. I am not sure how difficult it is for others but this is something that right now is taking me some time since of the sewing technique. Let's just say this involves a protractor and the sewing for it must be almost onset perfect. Not to much allowance or to little. I'm going to update this post later to show you guys a sneak peak.

If anyone is interested in how to make it once the finish product is done I would be happy to tell you step by step instructions and photos on how to do it.

Update: 
So here is a picture of the pieces and as you can see it is quite circular or curved since well it's half of a circle. I hope this turns out okay at least since if it does, I have some more ideas on this kind of design :) 


Thursday, September 18, 2014

Proof is in the Plaid (Pants!) (Simplicity 4760)


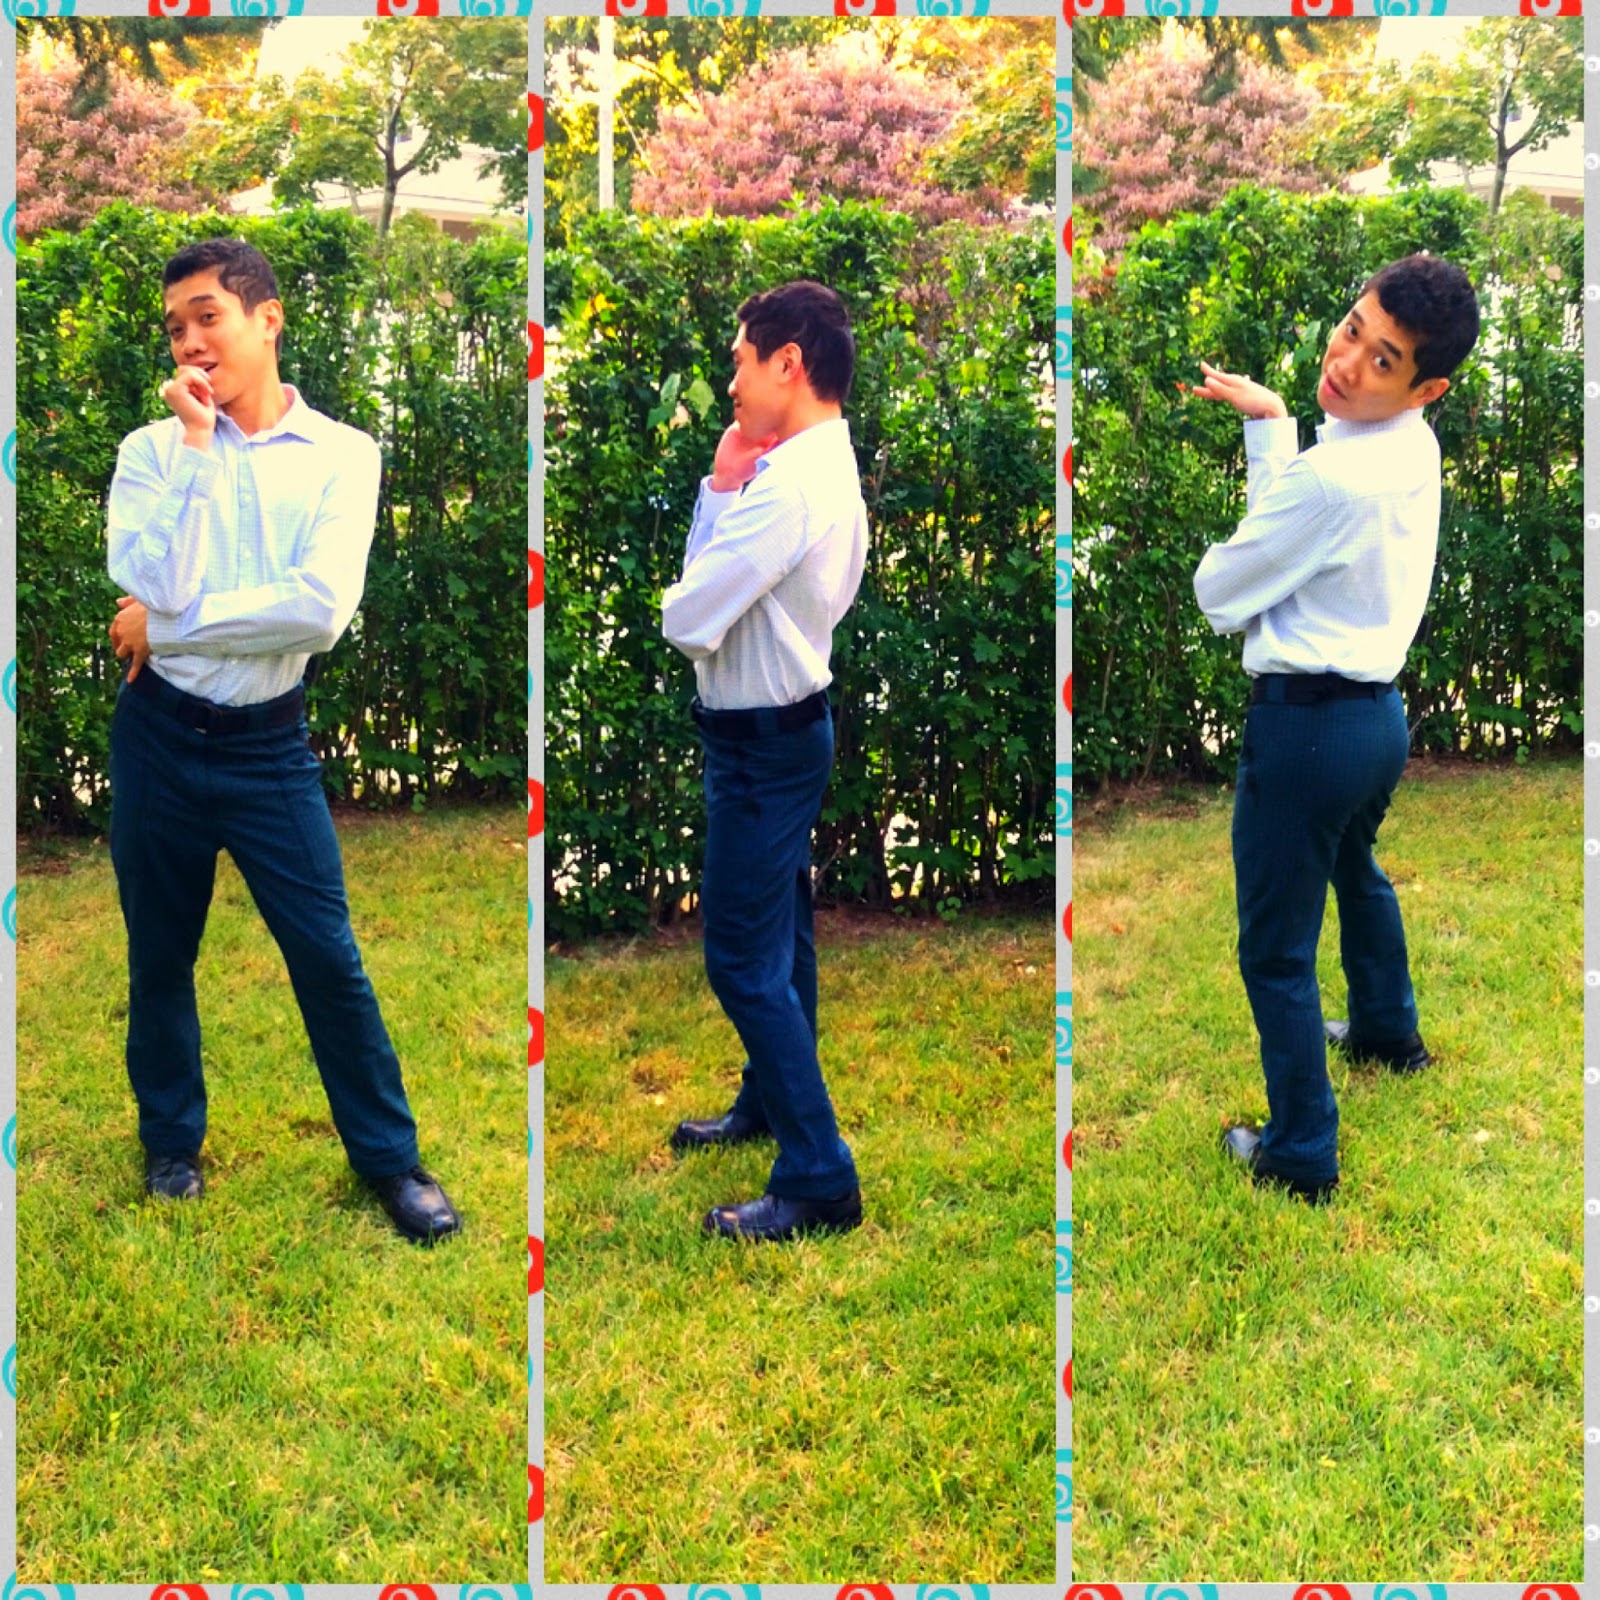
So unfortunately I can't take full credit for these awesome pants that I made so the credit goes to the Pattern Simplicity 4760. That being said the construction is different. The pants are supposed to be like khakis but, I wanted to do something that wasn't in a khaki material so I picked cotton!

Being that I am not the same height as other guys and I still wear kids sizes (I really do), there was a lot of altering in this. For starters the pattern was nice enough to add two sets, one for a men's size and another for kids. With that being said, the fit for the kids would of done better but, the waist and hips were better fitting for me over all. The legs however, well that wasn't any fun. Pants in themselves aren't much of a challenge but, its the fly front that is a tad confusing but, thats later. First the pattern pieces!

People have told me i'm more slender and so I had to seriously take it in. The sizes on the pattern aren't 12-14-16-ect. but, small, medium, large and x-large. I chose small but, the legs on the small are way to big still so I took in before I cut from around the buttock down about two inches, and then put the pattern against my leg to see if it fit well and it was close. The same with the back piece. I then also took the hem up a tremendous amount and mind you I think I shaved off about four inches on both pattern pieces before actually pinning and cutting.

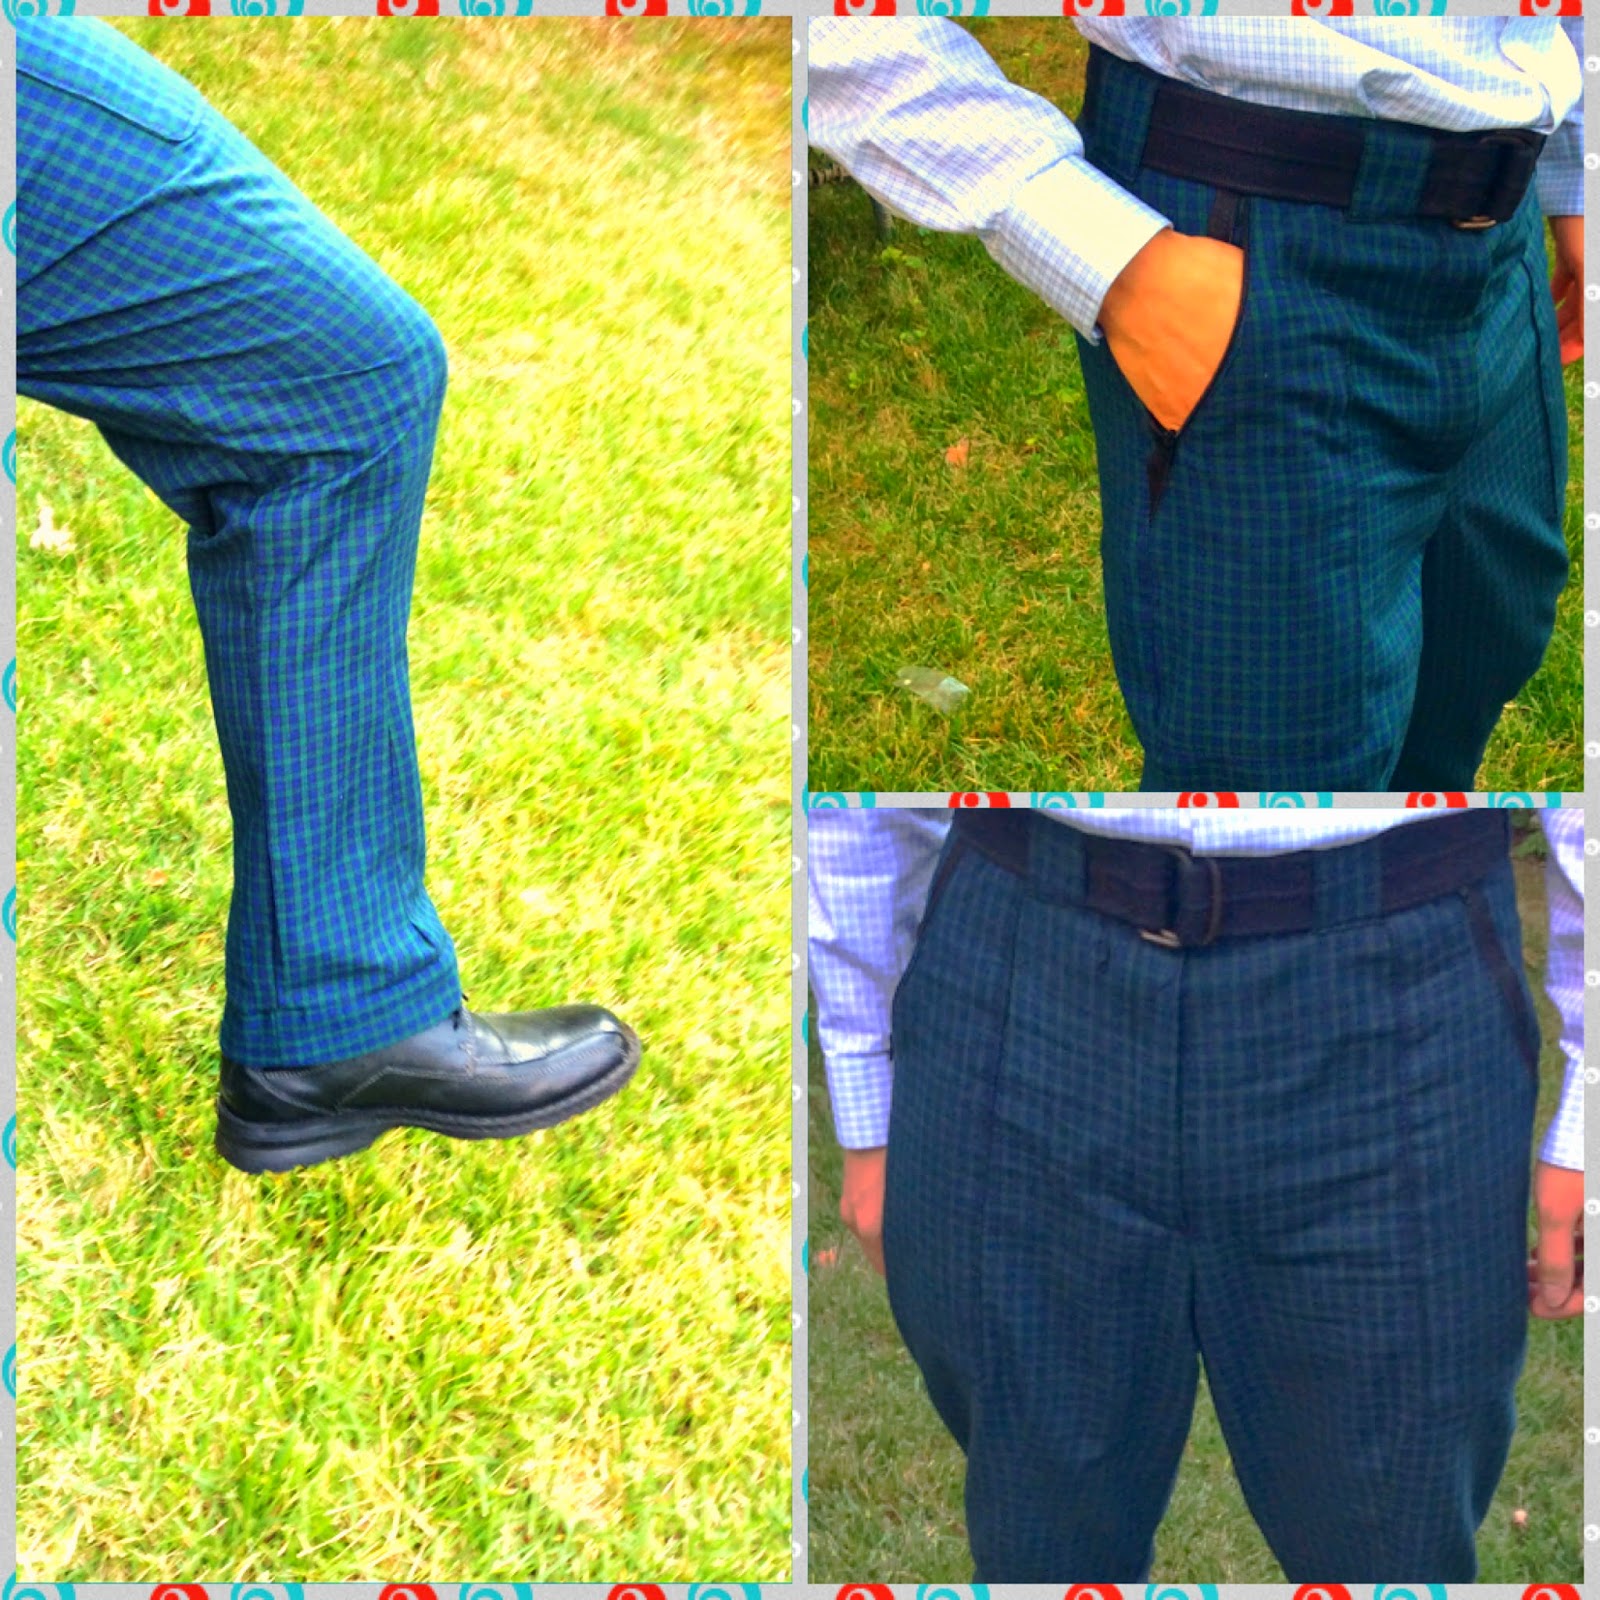
When I did start the construction of the garment, it said to cut one fly front but, I'm used to do the fly with two (I can provide a link if you readers would like :) and trust me when I say this: NEVER LISTEN TO THE PATTERN INSTRUCTIONS FOR A FLY FRONT ZIPPER! It was confusing and so glad I did it my way. To get around the fraying of the fabric, I measured an extra 5/8 of an inch around the fly front but, just not the top since that tucks neatly into the waistband. Then you just do a bridal hem as I've learned around the extra and you have a neat finish that pinking shears yes they do well but, I don't trust them 100% since of my experience. The same was done with the curve of the pants pattern, which does well actually if anyone says otherwise. Then the fly front zipper was done and the pockets were then placed. Mind you these pockets I didn't like originally since I want something to fit my wallet and phone without the worry of falling out so I added zipper to the pockets but, these were patch pockets so it was easy. after that was done I then sewed the legs together but, I didn't top stitch like I normally do since I know with my size, I still have to take in. I then moved onto the waist band which I then interfaced and again strayed from directions. I actually noticed in my years of sewing that the patterns for the waistbands yes are getting more considerate about fabric usage but, also they are getting really really small so instead of just cutting one piece of each I cut two. I then folded and top stitched the waist band to it. I forgot to add, the carriers were added before the waist band and then the top of the carrier is folded and then a close zig-zag stitch is applied to not let it move. Remember everyone, carriers don't always match the size of the waistband, I checked on my jeans and was surprised myself actually. The hem, I added an extra piece of fabric since I don't like my socks showing and I thought it looked nice.

This is a separate paragraph just for the resizing. All that taking in on the pattern and such didn't help as much as I thought. They were just to big since I ended up taking another 4 inches in on each side and when I tried them on, they were still to baggy and didn't look good on me. If anyone is wondering how I got it to hug my legs more, I made fish eye darts (If I remember the correct term). The dart is right down the middle for both legs and starts about an inch after the patch pocket for the front and a little below where my butt ends. It is 1inch at its center on both sides and is about I would say ends 1 1/2 inch before the break in the hem. I added it since I don't like baggy looking pants and I wanted these to be a twist on some professional attire.

So what do you guys think? If you guys like, I can show you how I finish my raw edges my way for those who don't have a domestic serger or a serger (serger is also known as an overlock machine) in general and don't want to do pinking shears in the next post. Its a bit more work but, you'll love the outcome! I can also show you guys a easy way to do a fly front that will come out perfect every time! I actually want to do another pair of plaid pants but, in a different plaid.

Tuesday, September 9, 2014

Florally Yours, Sincerely Your Peplum Pink

Front, Side and Back View of Dress


         So this dress I wanted to use up some of this pink fabric I found on sale (remnants) and this great floral fabric I had stashed away. The floral I was actually still trying to see how they did it since the design isn't printed on but rather its in the thread or sort of how home spun fabrics are with plaid which I thought was awesome! I also wonder if this fabric was painted too but onto the dress!

        This dress is a one shoulder strap with a sweetheart neckline (flattering for most if not all necklines) with a peplum skirt. Its sweetheart has three pleats in the center and separate side pieces as well as a lining. The back of the dress bodice isn't closed with zippers but, hook and eyes. The middle portion of the dress or Midrift is a single piece that I had to add onto myself since the original pattern of the dress was an a-line skirt. The skirt consist of a waist band and as a closure I did a center zipper. The peplum I didn't follow to their construction instruction (mainly since I almost forgot about it) but, did my way instead which was fold it on three sides and then stitch it over. It seems to work fine and I have also been able to blend it into the top stitching design of the skirt half of the dress. The top stitching is different also since I didn't just top stitch on each side but, rather break it up, center seam of the skirt has one top stitch and the side pieces each have two on one side. The skirt area since the skirt was made to sit originally a bit lower I had to bring up and because of that I also had to add darts to it but, they are just in the back so no worries.

Over all this dress for me I feel like came out better than I expected. I do wish I could do better on the zipper area and that area but, overall I love the way this came out since what I had to work with. The funny part was I was actually running out of fabric. The saved pieces of it don't even equal anything I can make out of it so dodged a bullet there so to speak. What are your thoughts about the dress? I would love to know.

Fabric Fabric Fabric!


         I know I was supposed to post up garments but, recently the Joann Fabric near me had a sale on their red tag fabrics! It was 50% off already discounted fabric, can someone say weeeeeeeee!!!!! I went there and when I saw the sign (no one else noticed it I think) I just went crazy and started pulling. I mostly got cotton but, two of those are flannel. I bought from two different Joann Fabrics. One in New York and another in Connecticut (I went to go visit my little brother). I have to say I ended up like never needing the sizzors really since I intentionally got the ones where it was near the end. I never got why people would never get the remnants, their already discounting them so why not just get it and make life easier. Oh and incase you were wondering the fabric was down to $1.50- $2.00 per yard! I can't wait to make something with them. Especially loving the plaid and nursery fabrics right now, don't know why but, they just make me happy. Did anyone else get any fabric at the sale? 

Wednesday, August 27, 2014

Pleat Down the Center (Butterick B5450)

Frontal and Side view of the Garment

Pleat, Trim and Edge Stitching/ Top Stitching on Garment

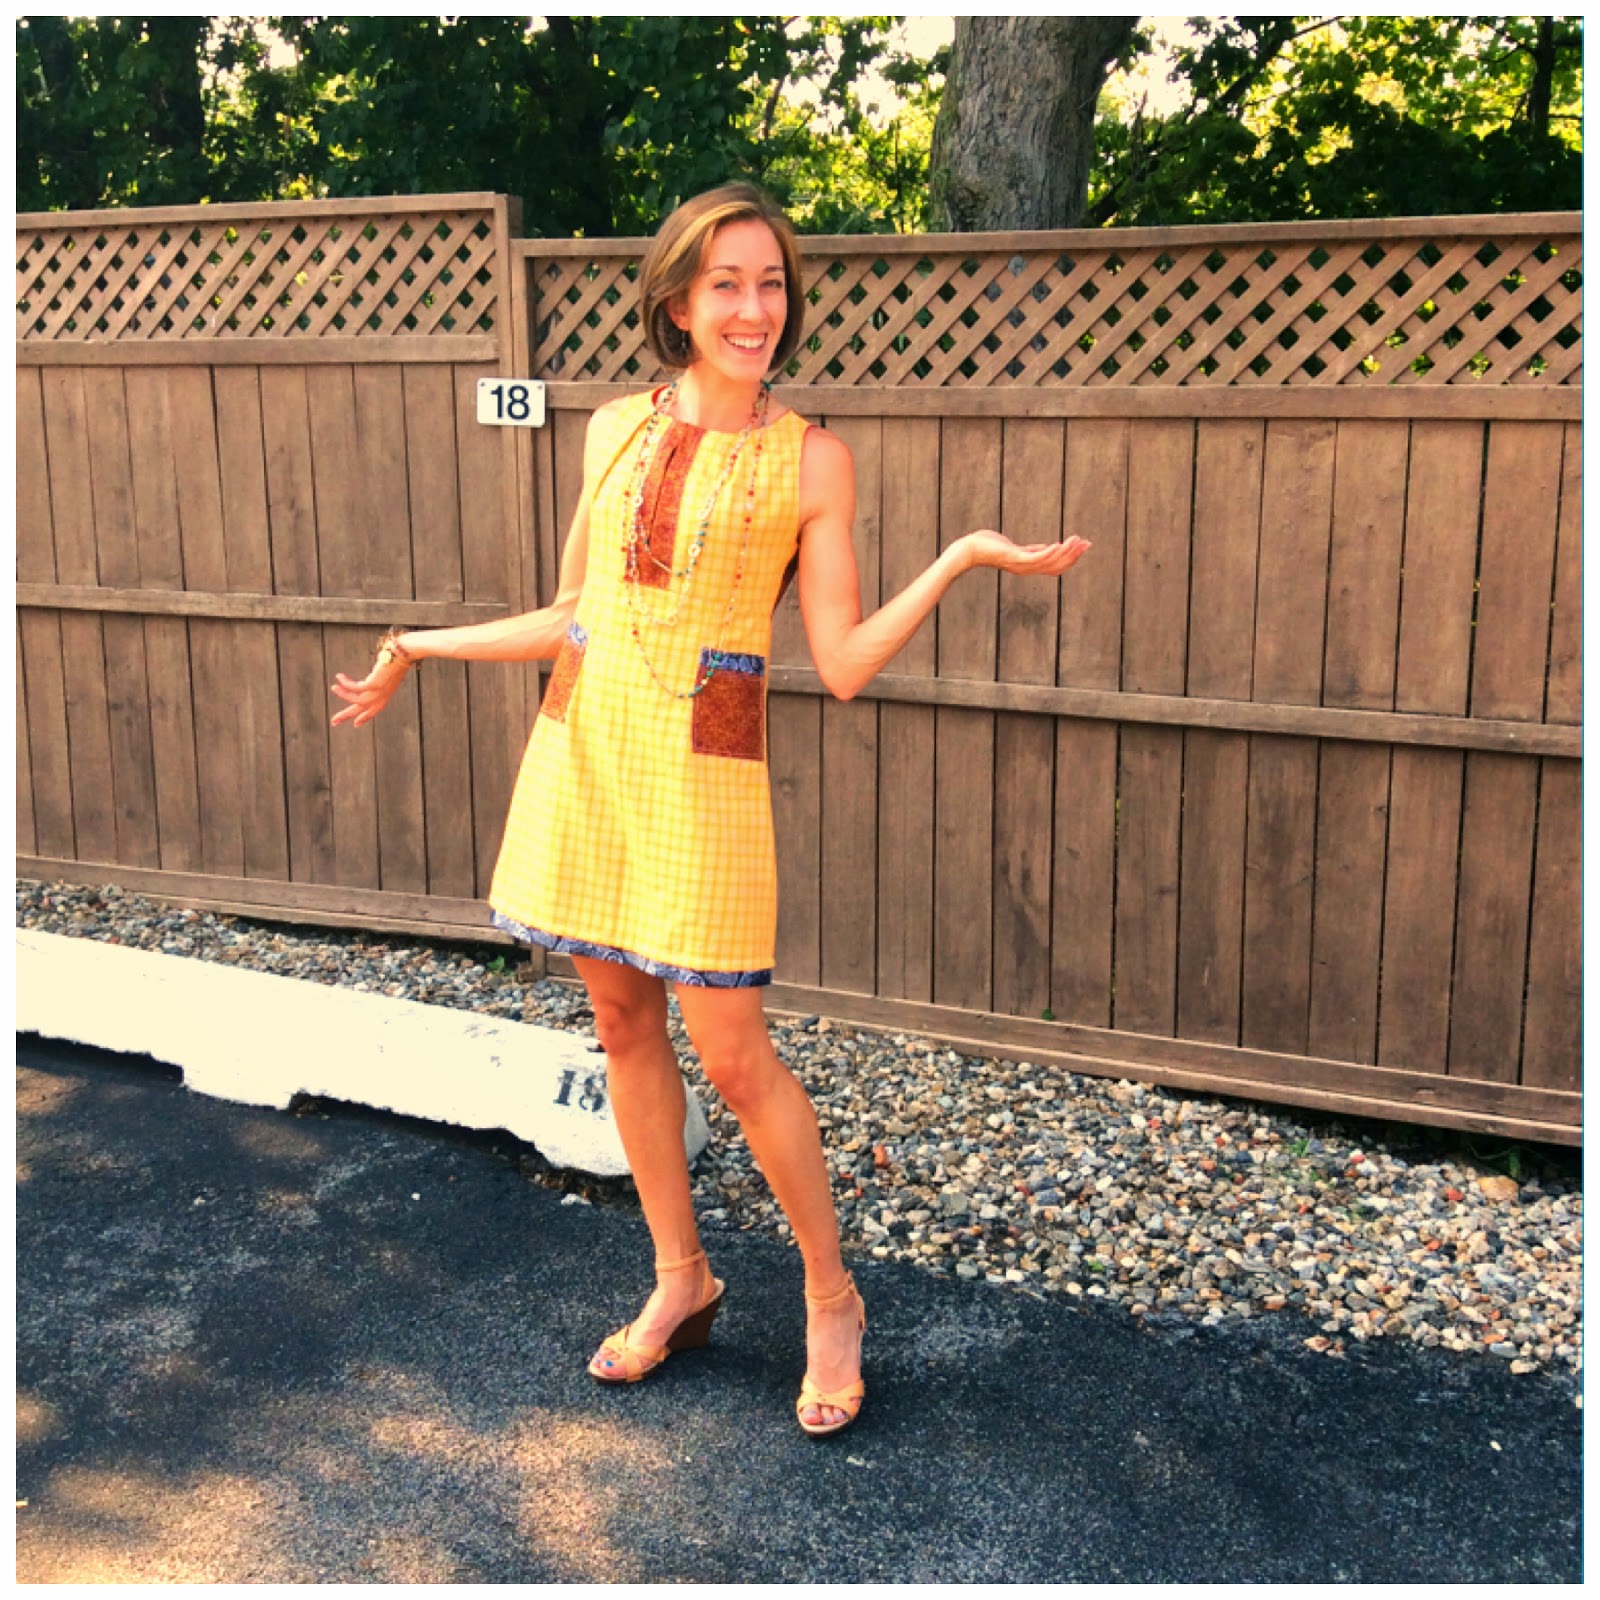
          This dress I made for my friend since I have been wanting a real life model instead of a dress form. This dress, I wanted to be work appropriate and so the neck line isn't as low as the other necklines i've made. Its a round neck I believe (correct me if I'm wrong since I forgot).

          The dress is made from 100% cotton and the pockets and trim are a bit different. I used ribbon I found in Joanns and used it also on the pockets to add/tie the look together and extend the pocket's size all together. The zipper is different than usual since I've never done it before, a side zipper with lining and this was my first time with working with a zipper and lining. I treated it and made it a center zipper. Oh I forgot to add, I know that some people don't like patch pockets since things can fall out so I added velcro for quick open and close/ not having your things fall out. The back of the dress, I top stitched the center seam on both sides and the lining is red fabric as well as I top stitched so there wouldn't be that annoying issue of a weird fabric pulling that some garments do when it has lining. The top of the garment if your wondering also has pleats on the the front and back of the bodice piece and the skirt piece has darts on both the front and back also.

          Since this is a actual live model and if you guys are wondering about the accessories, the necklaces are from Lord and Taylor and a consignment shop. The earrings are handmade that were from her mother.

           Anyway, what do you guys think? I'd love to hear your thoughts and ideas for my next project.

Oh also if your wondering the pattern piece I used for this, it was Butterick B5450 and I altered it slightly around the pleat and the addition of pockets.

Thursday, August 21, 2014

Black on Red with White In Between


Black on Red with White In Between

     Hello everyone who still reads this (hopefully). I wanted to have it sooner but, I got sick and have been fighting off a cold for a couple of days.... Anyway here is the fitted skirt I finished. 

     The skirt takes about two yards of fabric but, I'm rounding up and I got inspired a bit by a Korean pop music performance. I wanted this skirt to be sexy, when you walk it makes guys want to look at those legs that they love so much. The patterned black and white part part of the skirt is remnants from Joann and the red is fabric I had laying around. I top stitched the seams in a decorative way but, a different way. There are two decorative stitches on both dies of the seam for the front and one stitch on both side of the seams for the side seams and back. There are zippers that start from the hem and go up four inches which you can unzip (I should of gone with a longer zipper for it now that I'm thinking about it) which was for the "sexy" effect. The back closure is a centered zipper, 9 inches. The hem is a 1 1/3 inch hem. The seams are finished off by a domestic finish but, for anyone who is interested, I added an extra inch or inch and a half on the pattern and then folded it and sewed it off then treated it like a finished piece of fabric so with 5/8 seams and all. 

     In my personal opinion though, for anyone who doesn't have a serger, if you decide to finish your seams the way I did for this project, it really does look nice and makes it easier to work with. Its more work though in a sense but, for zippers especially you don't have to worry about it unraveling. I thought about zig zagging but, I'm working on an older machine and don't understand the zig zag stitch to well yet and if you don't zig zag right on the edge, the fabric unravels up to the zigzag in a bad looking way. 

     Anyway if you guys have any other questions please feel free to leave any comments below and I hope you enjoy this skirt. Now for my next project I'm not to sure but, super excited at the very least! 

Sunday, August 10, 2014

High, Low and More


Closures of the dress, pleating and finishing

Hello everyone for anyone who is still reading, I am sorry I wasn't able to update this sooner since this is actually a dress I had to basically make from three different patterns and still gave me hair pulling moments. I will list the patterns used below after this but, onto the dress!

This dress I can't even give you the exact fabric yardage it took since I just took a bunch of fabric I had and layer and cut but, I am going to estimate at about 3-4 yards of fabric. The top of the bodice piece, the neckline wasn't originally broken but, I wanted it open so I had took some news paper, traced over all the original piece and then pinned and altered on my dress form. I then had to decide how to cover the bust of the dress so I chose fabric that would be contrasting. I also used elastic to give it that effect. The middle of the dress I wanted to leave open but, not have the panties showing so I had to cut an extra piece of fabric, then top stitched it and added it. The skirt was originally longer and was a split but, I wanted to add pleating and give the dress some volume. I thought of just going with that design of making it the  regular skirt but, it didn't seem to have much volume to it and wanted to add something extra. So I pleated, added extra inches for more pleating and sewed. Looking at it a second time for some reason I have the strangest vibe of a cowboy skirt kinda thing, I don't know why though.

The closures are a centered zipper (I'm not the best with zippers but, I tried my best! Also a hook and eye for the bodice. Their are darts there since if I didn't ad the darts it was hugging the body figure in where I felt like side boob could have been seen. The finishings on all of this are domestic so you have the french seam for one, and it is lined on the inside so you can't see the seams for the bodice. The high low portion of the skirt I did a bit different. I sewed down the skirt on both sides first at about half an inch then treated it as a regular piece of fabric, sewn at the standard 5/8's and then finished it by folding again and sewing down. 

Anyway what do you guys think? I would love to read your comments and plan to make a skirt for my next project. That will be up hopefully by next week. 


Tuesday, July 22, 2014

Simple dress I made

So first a foremost blogger community I would like to welcome you and thank you for viewing my first post in a long time. 
This is my first dress i've done in a long time so my skills were a little rusty but, practice practice so onto the dress.
The dress is a Butterick 5136 pattern that I used for the top that I altered slightly. It had a vintage feel which I love but, I did the skirt a bit different which was a bit of an aline. I forgot to mention it in the video but, I added darts to the skirt in order to make it fit. The hem is big since I recycled our old blanket (their clean since I cleaned it like 3 times). I also added a brown zipper that is visible since I like that actual break up in the fabric. 
The top its self has I believe top stitching or edge stitching, I can't remember since I always got those two confused, it is also lined inside since the pattern was nice enough to come with a lining. The back of the garment originally called for a zipper coming up but, I wanted to be cheap with the zipper since I didn't feel like waiting for finish this so I made it a stretchable instead with elastic which is encased in the black fabric you see in the back. The strap I saw on the pattern gave me an idea to braid it since I like to change things up a bit but, with a braid going straight into the seam it reminds me of those beach bags you see for sale so I let it branch the three pieces first then braided it. The back works a bit similar but, when constructing it the braid actually flattens out in the seam. 
The finishing for this fabric since if you guys are wondering for those who don't have servers at home, I actually was able to do a french seam for some of the seams (mainly the bottom) but, the top, the lining concealed my fabrics so no fraying is showing nor will actually fray because of that. 
Any other questions or such just comment and I will respond the best I can. The video is just the same thing written here but, in video form. So have a great day and enjoy! 


Wednesday, March 21, 2012

Wedding Dress Train Wreck?


I recently read an article on Yahoo and I had to post this in case no one else read this. This wedding dress is the new dress in the Guinness World book of records for longest train. The article said that this dress cost (material alone) 7,300 dollars. Imagine the work of this dress also! I've seen the dress's front view and i've got to say its very lovely. A bit to simple but, am loving the lace. This dress though with the cost alone lets not forget the work that went onto this design must be astounding to add to this price tag! The train is 1.85 miles long! Your probably wondering why the hot balloon picture above. Well this dress was so long that it was just easier to carry it via hot air balloon LOL. Rest of the Article is below. What do you guys think though? Is it a a marvelous train? Or did it just end up being a Train wreck. Comments below please ^_^.


Tuesday, March 20, 2012

Burda Pattern 7232 (Finished!)

Burda Pattern 7232
Pieces cut out

Front view
back
Trying to look like pushing a tree
Not just me in the picture
hem


soooo sassy


its cold going back inside


Sorry bloggers for taking so long. Its just i've recently taken up running and then I just sorta forgot but! here it is. The finished product of Burda Pattern 7232. This pattern was much more differet than what I was normally used to so it was a bit more complicated and a bit ahhh!!! But it worked! The skirt of the dress is a circle skirt so it was finished with a 2/8's hem. Hardest hem I've done but it was actually easier than I thought. The back's closure is a zipper for the skirt part and snap ons for the bodice back. The gold buttons are there just for decoration. The origina pattern called for a I bealieve a crew neckline and my sister wanted it a V-neck so I converted it to a V-neck. When she posed with the dress, she first did the hair and to me it set the tone for 1940's or 1950's so I thought some a simple pearl necklace would befit the dress nicely. Also she wore a charm and stalking bracelet. Her shoes were lavander peep toe shoes. They were from Vera Wang from Kohls. Anyway what do you guys think? Is the styling good? How do you like the dress? I know it pulls a bit but, it only pulls when pressure but, what does the blog community think? I'd love to hear your thoughts ^_^.

Accsesories:
  • Charm Bracelet: Betsy Johnson via. Gifting Grace, Hippo Safari
  • Stalking Bracelet: Walmart (2 years ago so don't think it'll be there)
  • Shoes: Verra Wang line, Kohls ( 3+ years ago so not sure if its still there
  • Pearl necklace: Gift


*Again sorry for taking so long. The next article I'm going to make though is a paper bag skirt so that shouldn't take me long at all and thank you for those who have been patient in waiting*